If you’re a wedding photographer and you’re on the search for some Lightroom editing hacks that will really up level your photos and editing experience, then stay tuned! Over the years I’ve learned quite a few tips, tricks, and helpful hacks that have saved me SO MUCH time during the editing process, and I can’t wait to share them with you all!
Rachel C. Photography | Top 7 Lightroom Editing Hacks For Wedding Photographers To Up Level Your Photos! | Photographer Mentor
This Post May Contain Affiliate Links. Please note that as an Amazon Associate I earn from qualifying purchases. This is at no additional cost to you, and I only share products I personally use and love!!
1 – Photo Inconsistency?
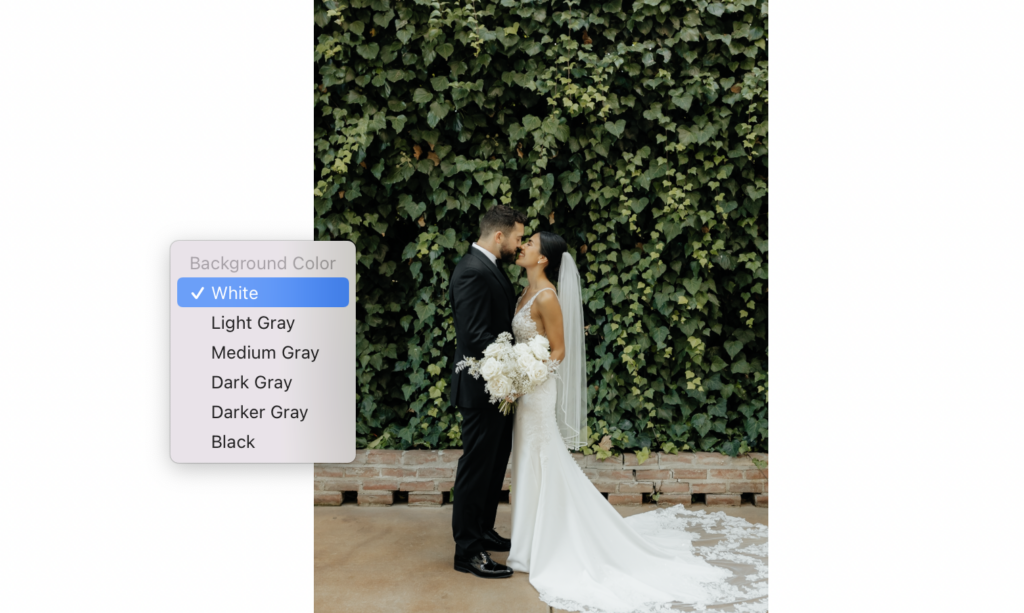
Do you ever wonder why your photos look different on your computer than they do on your phone? Talk about irritating, am I right?! There are a few reasons this could be! First, your laptop should be calibrated to Adobe RGB. Second, change your editing background to white instead of the gray it automatically sets. This helps keep your white balance true to what you want it to be! Just right click next to the photo and change it!
2 – Grainy Photos? I’ve Got The Lightroom Editing Solution!
There’s nothing more irritating then your photo turning out grainy when that wasn’t the intention! The wonderful thing is that Lightroom now has an AI denoise option that works like magic!!! Check out Adobe’s “Easily remove noise from images using AI-powered Denoise” guide and video below that will walk you through how to do this! But if for some reason it doesn’t work, I just make the image black and white. Then I add more grain to make it feel intentional. Don’t feel that you have to abandon a beautiful photo just because it’s a bit too grainy. They often make beautiful B&W images!
3 – Soften Your Images
Let’s be honest. No one actually wants to see themselves in the insane quality of photos our cameras take (ie every single pore on our face haha)!!! To combat that, I recommend dropping the clarity just a smidge (-5 to -20) to soften the image. It’s much more flattering on the skin and gives a beautiful soft glow!

4 – Linear Gradient
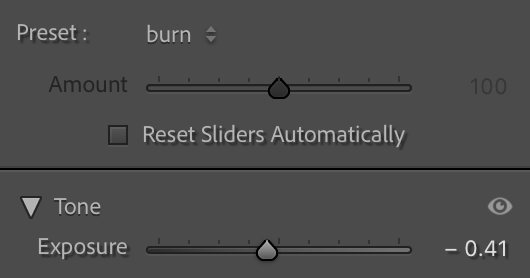
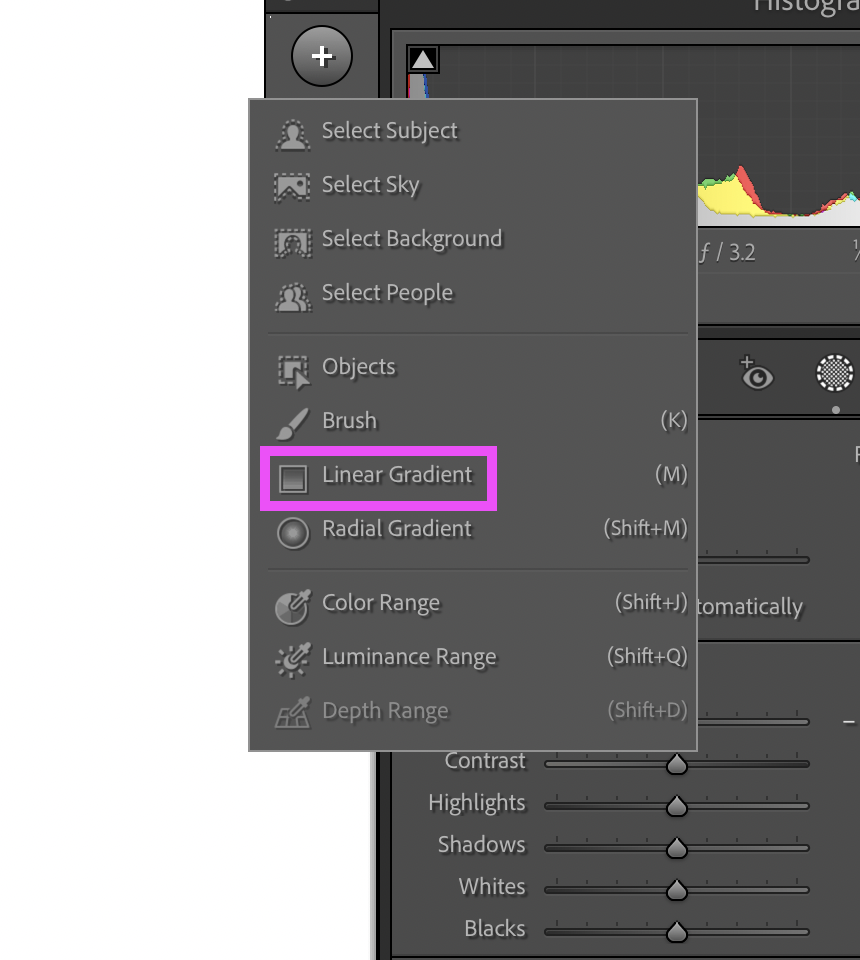
Use the linear gradient in “burn” (about -.30 exposure) and drag from the bottom of the photo about a quarter up. Did you know that darkening the bottom of the image naturally causes peoples eyes to look up at the subject? It’s a very subtle move, but one that will make a big impact in the final results of your photos!

5. Adding Depth in Your Images With Lightroom Editing
Adding contrast isn’t necessarily the best way to add depth and dimension to your images. If you desire a softer look in your edits, I recommend dropping the contrast into the negatives (this will reduce sharpness) and then deepening the blacks into the negatives (this will give your photos more depth). Contrast tends to add a sharp look while blacks add depth. Play around with the relationship between the two to figure out what you like best!
6. Create Collections Inside of Lightroom
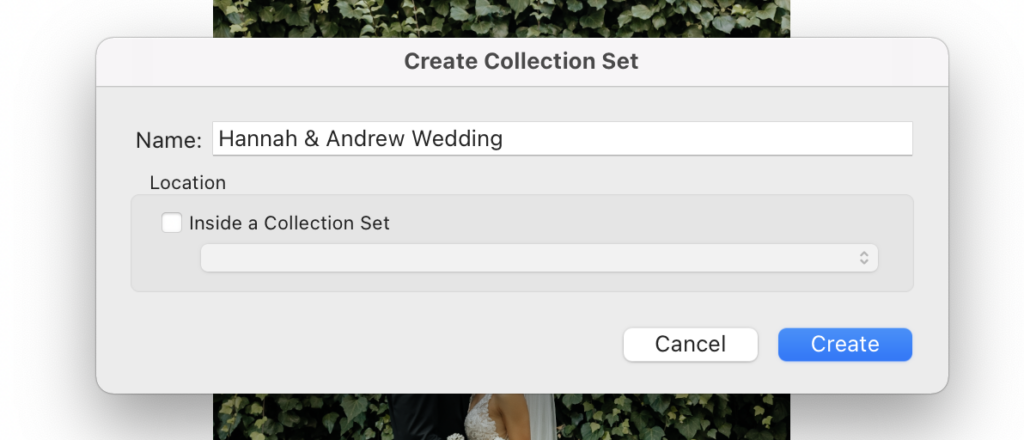
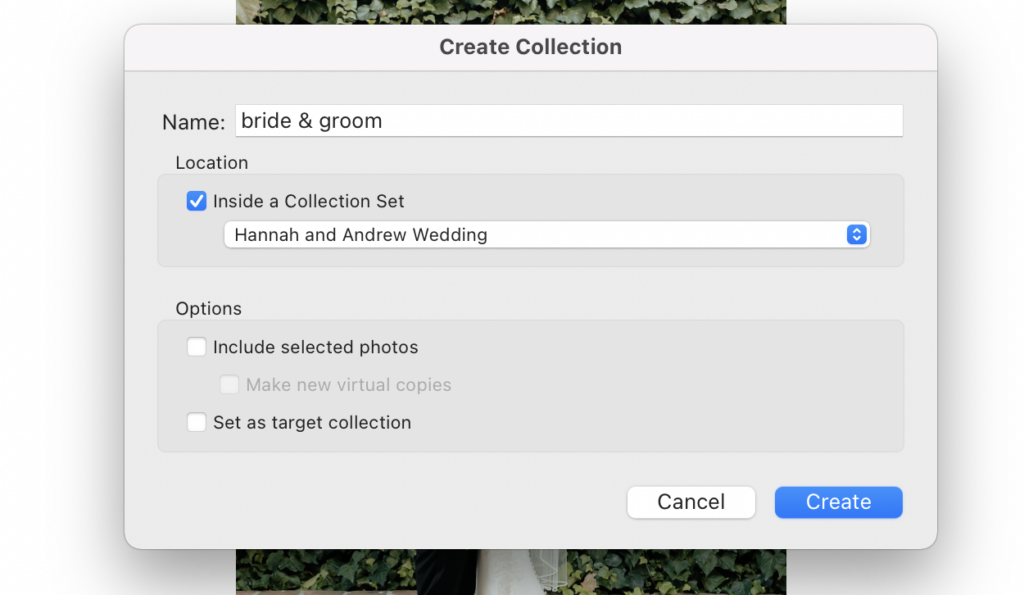
Not only should you have a separate catalog for each wedding, you should also have collections as a way to stay organized! On the left panel of the Lightroom dashboard you can scroll to the very bottom and create collection sets. I set mine to “Couples Name Wedding” and then create collection folders underneath that one as follows:
-Details
-Bride getting ready
-Groom getting ready
-Couples portraits
-Ceremony
-Reception
-Family Photos
-Wedding Party Photos
From there, you can select and drag & drop the photos from the catalog into the separate collection folders. This is helpful for organizing, creating consistent edits, and exporting into separate folders before adding to your online gallery. It makes a world of different when your work is organized and it will make it easier for you and your clients to jump to certain parts of their gallery if desired.


7. Use Aftershoot to Cull & Edit Your Images!
Aftershoot is an AMAZING software that I recommend using to cull and edit your images. You’ll need to create your editing profile which is very simple to do. Aftershoot will walk you through this step! Then you your images into a Lightroom catalog. Once you’ve organized your photos into collections, close out of Lightroom and upload your catalog into Aftershoot edits! It does a really good job at getting for your photos pretty dang close to what you’re looking for! I absolutely LOVE it! It saves me so much time in my editing and culling process, while still allowing me to do what I need to do and deliver the best work to clients! Check out Aftershoot here, you won’t regret it!
Will You be Up Leveling Your Lightroom Editing by Implementing These 7 Hacks?
I hope you’ve found these 7 Lightroom editing hacks helpful and time saving in your editing process! You can check out more tips and tricks on my photographer education blog where I give tons of tips, tricks and hacks for wedding photographers! Looking for more in depth support? Check out my Photographer Mentorship where I offer deep dive coaching calls, 1:1 person mentorships and styled shoots to build your portfolio, or even a six week accelerator that’s JAM PACKED with education! Feel free to learn more about me here. If I sound like the perfect photographer mentor for your, then apply to work with me here!
+ view the comments
